
In today’s digital-first business environment, collaboration is crucial, especially when managing ad campaigns and assets on social media platforms. That’s where Facebook Business Manager steps in as a central hub for streamlined control over your brand’s Facebook presence.
Whether you’re working with an agency, freelancer, or another business, knowing how to add a partner in Facebook Business Manager can make all the difference in maintaining security, efficiency, and shared responsibilities. In this updated 2025 step-by-step guide, we’ll show you exactly how to invite a partner, assign roles, and manage access within Facebook Business Manager.
Need help with Social Media?
Get a free strategy session with our experts — no commitment required.
Let’s get started and unlock smoother collaboration, smarter workflows, and better control over your Facebook assets.
Prerequisites
Business Manager
You must have a Facebook Business Manager account set up. If you don’t have one, create it at https://business.facebook.com.
Partner’s Business ID
Obtain your partner’s Business ID, which is a unique identifier for their Facebook Business Manager account. They can find it in their Business Settings under “Business Info.”
Mutual Trust
Ensure you trust your partner with the level of access you grant them, as they’ll be able to manage certain aspects of your business assets based on the permissions you assign.
Steps to Add a Partner in Facebook Business Manager
1. Access Facebook Business Manager
Go to Facebook Business Manager Settings and log in using your personal Facebook account credentials.
2. Navigate to Business Settings
Once logged in, you’ll see a list of businesses you manage. Select the business where you want to add a partner.
3. Add a Partner
In Business Settings, locate the “Users” section in the left-hand menu. Click on “Partners” and then click the “+ Add” button.
4. Enter Partner’s Business ID
Enter the Business ID of the partner you want to add. This ID is provided by your partner and is linked to their Facebook Business Manager account.
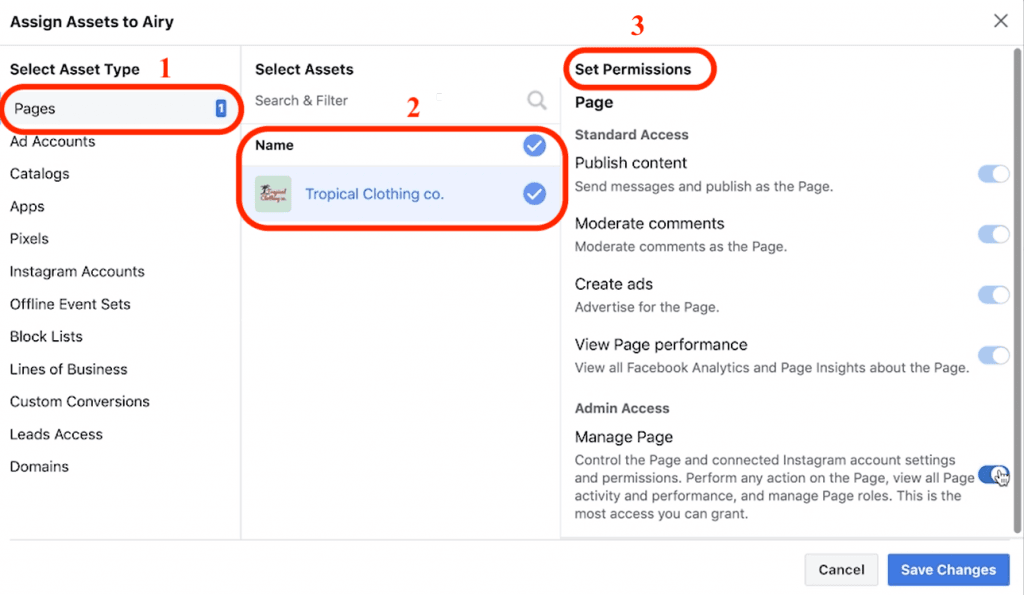
5. Select Assets and Access Level
After entering the Business ID, choose the assets you want to share (such as Facebook Pages, Ad Accounts, and Pixels). Then assign the appropriate access level:
- Admin: Full control over selected assets.
- Standard Access: Can view and edit most elements but cannot create or delete assets.
- Custom Access: Allows you to define specific permissions for each asset.
6. Send Invitation
After selecting access permissions, click “Next” or “Send Invitation” to invite your partner.
7. Partner Acceptance
Your partner will receive the invitation and must accept it via their Facebook Business Manager account.
8. Confirmation
Once the invitation is accepted, you will receive a notification confirming the partnership. Your partner will then gain access based on the permissions you assigned.


