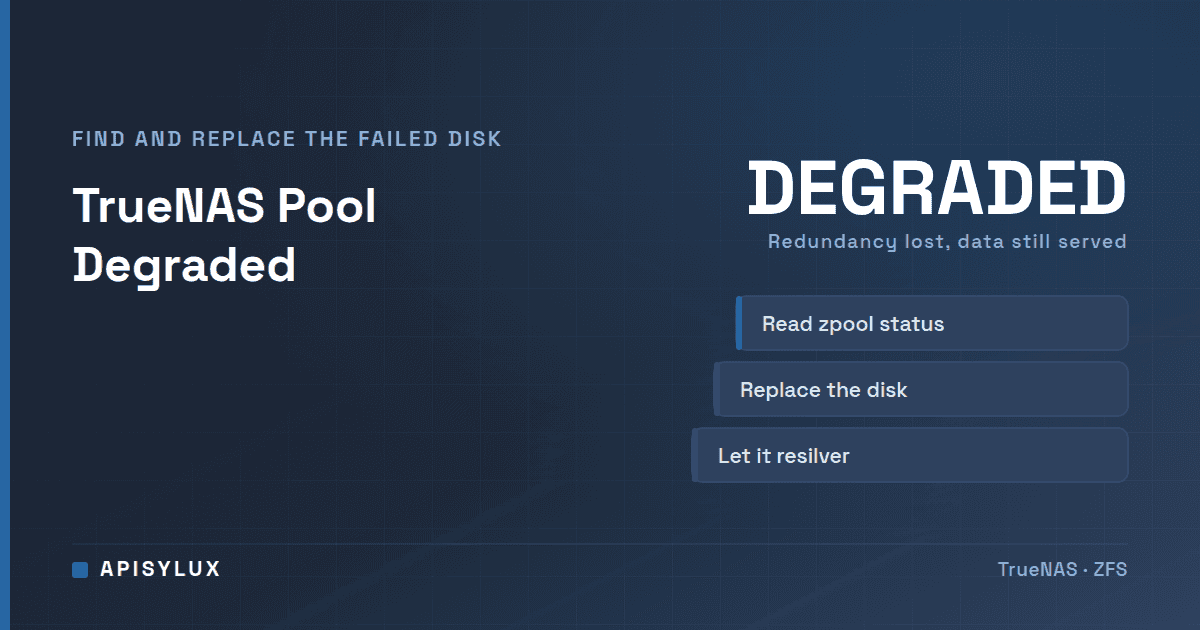
A TrueNAS pool that shows DEGRADED means at least one disk in a vdev is offline, removed or failing, but the pool still has enough redundancy (a mirror partner or RAIDZ parity) to serve all of your data. The fix is to find the failed disk with zpool status, replace it (or clear the errors if the disk is healthy), and let the pool resilver. Until that finishes you have less protection than you think, so do not reboot, pull drives or start other maintenance blindly.
Key takeaways
- DEGRADED on its own is a warning, not data loss: ZFS says "sufficient replicas exist to continue functioning". It is also the moment a second failure can destroy the pool.
- Run
zpool status -vand read the per-disk state and the READ, WRITE and CKSUM columns before touching hardware. - Match the failed disk by serial number, never by slot guesswork, before you pull anything.
zpool clearonly resets error counters. Use it after you have fixed a transient cause, not to hide a failing drive.- Replace the disk with one of the same or greater capacity, then wait for the resilver to finish before doing anything else.
- Confirm a recent backup or replica exists before you start. A degraded pool is a bad time to find out you do not have one.
What does "pool degraded" mean in TrueNAS?
The OpenZFS pool-concepts manual defines the state precisely: a top-level vdev is DEGRADED when one or more of its component devices are offline but "sufficient replicas exist to continue functioning". If too many devices are lost, the vdev is FAULTED instead, with "insufficient replicas", and the pool can stop serving data. The individual disk states you will see inside a degraded vdev include:
| State | Meaning (OpenZFS) | Typical next step |
|---|---|---|
| ONLINE | The device is online and functioning. | None. |
| OFFLINE | Explicitly taken offline with the offline command. | Bring it back with zpool online if it was a planned action, or replace it. |
| REMOVED | Physically removed while the system was running (detection depends on hardware). | Check cabling, backplane and the drive itself; replace if it does not return. |
| UNAVAIL | The device could not be opened. | Check power and cables, then replace if it is dead. |
| FAULTED | On a top-level vdev: insufficient replicas remain to keep functioning. On a disk: its contents did not match expected values, or it had so many I/O errors that ZFS faulted it to prevent further use. | Replace the disk; if the whole vdev is FAULTED, stop and get help before changing anything. |
The pool-level warning you see in the web interface is a summary of exactly this. The OpenZFS message pages explain two related cases. ZFS-8000-4J ("a device could not be opened due to a missing or invalid device label") leaves the pool DEGRADED. ZFS-8000-9P ("a device has experienced uncorrectable errors in a replicated configuration") can appear while the pool still shows ONLINE, and it is often the early warning before a disk is faulted. Both point you to zpool status -x as the first step.
Need help with IT Infrastructure?
Get a free strategy session with our experts — no commitment required.
The ZFS commands here apply to every TrueNAS edition. The web interface steps below follow the TrueNAS 25.10 (Goldeye) stable documentation; other releases, and TrueNAS CORE, label some screens differently, so use the documentation's version selector if yours does not match. If you are weighing editions, see our TrueNAS Community vs Enterprise comparison.
How do I find which disk failed?
Open a shell on the TrueNAS system (the web UI shell or SSH; depending on the account you may need sudo) and ask ZFS which pools are unhealthy:
zpool status -xThe -x flag, per the OpenZFS manual, will "only display status for pools that are exhibiting errors or are otherwise unavailable". Then get the full detail for the affected pool (here called tank):
zpool status -v tankA trimmed, illustrative example of what you are looking for:
  pool: tank
 state: DEGRADED
status: One or more devices have been removed.
        Sufficient replicas exist for the pool to continue functioning in a
        degraded state.
config:

        NAME          STATE     READ WRITE CKSUM
        tank          DEGRADED     0     0     0
          raidz2-0    DEGRADED     0     0     0
            sda       ONLINE       0     0     0
            sdb       REMOVED      0     0     0
            sdc       ONLINE       0     0     0
            sdd       ONLINE       0     0     0
Read it from the bottom up. The vdev (raidz2-0) is degraded because one member (sdb) is not ONLINE. Non-zero READ, WRITE or CKSUM counts on a disk that is still ONLINE are an early warning; the OpenZFS guidance for ZFS-8000-9P is to look for non-zero counts, then choose between zpool clear for transient problems and zpool replace for persistent ones. With -v, the output also lists any files with data errors since the last complete scrub. If your output shows long identifiers instead of short names like sdb, add -L, which the manual says resolves the symbolic links to the current block device names.
Device names like sdb can change after a reboot, so map the failing device to a serial number before you remove anything:
lsblk -o NAME,MODEL,SERIAL,SIZE
smartctl -i /dev/sdb
On TrueNAS CORE (FreeBSD) use camcontrol devlist and glabel status to map device names to disks, and smartctl -i /dev/daX for the serial. The serial printed on the drive label must match what the system reports. If the disk has fully died it may not answer at all; in that case use the serials of the healthy disks to find the one left over. If the suspect disk still responds, smartctl -a (or -x, which the smartctl manual recommends for ATA disks) shows its SMART health result and attribute table, including reallocated and pending sector counts where the drive reports them.
Warning: pulling the wrong drive from a degraded RAIDZ1 pool, a two-way mirror, or any layout with no spare redundancy left will take the pool offline and can cause data loss. Identify by serial, and if the chassis has locate LEDs, use them.
Degraded with no errors: when is zpool clear the right answer?
Sometimes a pool is DEGRADED but every READ, WRITE and CKSUM counter is zero. That usually means a disk dropped out (a loose cable, a backplane glitch, a controller reset) rather than corrupting data. First fix the physical cause. If the disk reappears, you can bring that member back with:
zpool online tank sdbName only the disk that dropped out. ZFS then resilvers the data that went out of date on it while it was away. If instead the disk is healthy but has accumulated a few transient errors from an event you have resolved (for example a cable you have since replaced), you can reset the counters. The OpenZFS manual says zpool clear "clears device errors in a pool", and that with no device named it clears all device errors within the pool:
zpool clear tank sdb     # clear one device (preferred)
zpool clear tank         # clear every device in the pool
Warning: clearing does not repair anything; it resets the counters that told you something was wrong. Prefer the single-device form, and never clear the whole pool to silence an alert you have not explained. If the errors return within days, or SMART shows growing reallocated or pending sectors, replace the disk. After clearing, a scrub is a sensible way to prove the data is intact:
zpool scrub tankA scrub, per the manual, examines all data in the pool and verifies each block's checksum, repairing what it can on redundant vdevs. TrueNAS also creates a scheduled scrub for each pool by default (its 25.10 documentation lists every Sunday at 12:00 AM), so check that yours has not been disabled. ZFS will not start a scrub while a resilver is running.
How do I replace the failed disk in the TrueNAS UI?
Do this through the web interface where you can. TrueNAS manages disk partitioning and its own pool records, and its documentation describes replacement as a UI workflow. Follow this order; each step depends on the one before it:
- Confirm a backup. Check that a recent backup or replication of the data exists, and write down the serial of the failed disk.
- Find the disk. On the Storage Dashboard, click View VDEVs on the VDEVs widget for the degraded pool, expand the VDEV and click the disk that is not ONLINE (TrueNAS's example shows REMOVED).
- Take it offline. Click Offline in the ZFS Info widget; the status changes to OFFLINE. TrueNAS recommends offlining before the physical swap. Offline only the failed disk: offlining a healthy member strips away more of the redundancy you have left. If TrueNAS refuses with "Disk offline failed - no valid replicas", its documentation says to run a scrub from the ZFS Health widget, wait for it to finish, then try again.
- Swap the hardware. Remove the disk whose serial matches, and insert the new one. Hot-swap only if your chassis supports it; otherwise shut the system down cleanly first.
- Replace. Back on the disk's details, click Replace in the Disk Info widget, choose the new drive from the Member Disk list and click Replace Disk. TrueNAS wipes the new disk and starts the resilver.
- Wait. When the resilver completes the pool returns to Online; refresh the screen to confirm the new disk is in the vdev.
Three rules matter here. TrueNAS requires the replacement to be the same capacity or larger (the OpenZFS manual likewise requires the new device to be at least the minimum size of all the devices in a mirror or RAIDZ group). The replacement fails if the new disk already has partitions or data on it. And the Force option overrides that safety check and erases any data on the selected disk, so use it only when you are certain you picked the new, empty disk and not a member of another pool.
If the pool has a hot spare, TrueNAS activates it automatically when a disk fails. Its documentation then recommends offlining the failed disk and using Detach to promote the spare to a full member, and afterwards recreating the spare, rather than replacing the failed disk in place, which causes a second resilver.
For reference, the underlying ZFS operation is zpool replace. Its manual describes it as "equivalent to attaching new-device, waiting for it to resilver, and then detaching device", and notes that any scrub in progress is cancelled:
zpool replace tank old-device new-deviceIf you omit the new device, it defaults to the old device's path, which is meant for a new disk installed at that same path. We show the syntax so you can read logs and understand what the UI does. On TrueNAS, use the UI: the middleware expects to partition and track the disks itself. Never add -f (force) to a replace you have not double-checked; the manual says it forces use of the new device "even if it appears to be in use".
What happens during resilver, and what not to do
After the replacement starts, ZFS resilvers: it rebuilds the new disk from the data and parity on the surviving disks. The OpenZFS manual notes a resilver "only examines data that ZFS knows to be out of date", which is why it is usually quicker than a full scrub, though TrueNAS warns it can take a long time on pools with a lot of data. Watch progress with:
zpool status tankIt reports the percentage done and an estimated time to completion, both approximate. While it runs:
- Do not remove or reseat other disks. The pool is still running with reduced protection and the surviving disks are working hard.
- Do not start a scrub. ZFS does not allow one until the resilver completes.
- Do not clear errors on the surviving disks to make the alert go away. If another disk is throwing errors during the rebuild, you want to see it.
- Reduce heavy workloads where you can, and avoid unplanned power cycles. TrueNAS notes that resilvering degrades system performance until it completes.
- Keep the failed disk until the pool is ONLINE again, in case you need to consult it.
When the resilver finishes, zpool status should show the pool as ONLINE with no known data errors. Run a scrub afterwards to confirm, and check SMART on the remaining disks as well.
A degraded pool is also the right moment to test your backups. RAIDZ and mirrors protect against disk failure, not deletion, ransomware or a lost chassis, so keep a separate offsite copy. Our Carbonite backup solutions page covers one way to add that.
Boot pool degraded is a different job
If the alert names boot-pool rather than your data pool, the problem is with the operating system device, not your stored data. Run zpool status boot-pool to see it. In TrueNAS 25.10, go to System > Boot Environment (shown as Boot in some menus) and click Boot Pool Status; each device's menu offers Replace and Attach. If the boot pool fails and cannot be repaired, the documented recovery is to install a new boot drive, do a clean TrueNAS install, upload your saved configuration file under System > General > Manage Configuration, and import the data pools if they are not detected automatically. TrueNAS warns that without a configuration backup, a boot pool failure loses the whole system configuration, so keep a current copy off the box.
FAQ
Is my data safe when a TrueNAS pool is degraded?
Usually yes, for the moment: a DEGRADED vdev still has enough replicas to serve data. But you have lost some or all of your redundancy. In a RAIDZ1 pool or a two-way mirror, another failure can mean data loss, so act quickly and make sure a backup exists.
Can I keep using the pool while it is degraded?
Yes, ZFS keeps serving data. Avoid heavy maintenance, expect slower performance once the resilver starts, and replace the disk soon rather than leaving it for weeks.
Should I run zpool clear instead of replacing the disk?
Only if the cause was transient and has been fixed, such as a loose cable, and the disk's SMART data is clean. If the same disk keeps producing errors, replace it. Clearing counters never repairs hardware.
How long does a resilver take?
It depends on how much data the pool holds, the disk speeds and the current workload. Use zpool status for the estimated completion time rather than guessing. Large pools can take many hours.
Can I replace the disk with a larger one?
Yes. TrueNAS requires the same capacity or larger. A single larger disk does not add usable space on its own: the OpenZFS manual for zpool online -e states that in a mirror or RAIDZ group, all devices must be expanded before the new space becomes available to the pool.
If you would rather have an engineer review your pool layout and monitoring before the next failure, see our TrueNAS storage solutions, or size a new build with the TrueNAS storage calculator.
Sources
- TrueNAS 25.10 documentation: Replacing Disks
- TrueNAS 25.10 documentation: Managing Pools
- TrueNAS 25.10 documentation: Boot Pool Management
- OpenZFS zpool-status(8)
- OpenZFS zpool-replace(8)
- OpenZFS zpool-clear(8)
- OpenZFS zpool-scrub(8)
- OpenZFS zpool-offline(8) and zpool-online(8)
- OpenZFS zpoolconcepts(7)
- OpenZFS message ZFS-8000-9P
- OpenZFS message ZFS-8000-4J